AI Image Workflow
Real browser capture of the AI Image workflow
Overview
This tutorial shows the AI Image workflow inside the live confBuild editor. The screenshots were captured on March 6, 2026 and focus on the safe preparation stage before any image generation starts.
Project
Editable Carport project with the live 3D view available as render source
Workflow
Open View, choose AI Image, prepare prompt and optional style reference
Goal
Turn the current scene into a polished AI-generated render
Step 1: Open AI Image from the View menu
The AI render workflow starts from the View menu rather than the Tools menu. This keeps presentation-focused actions close to the viewport controls.
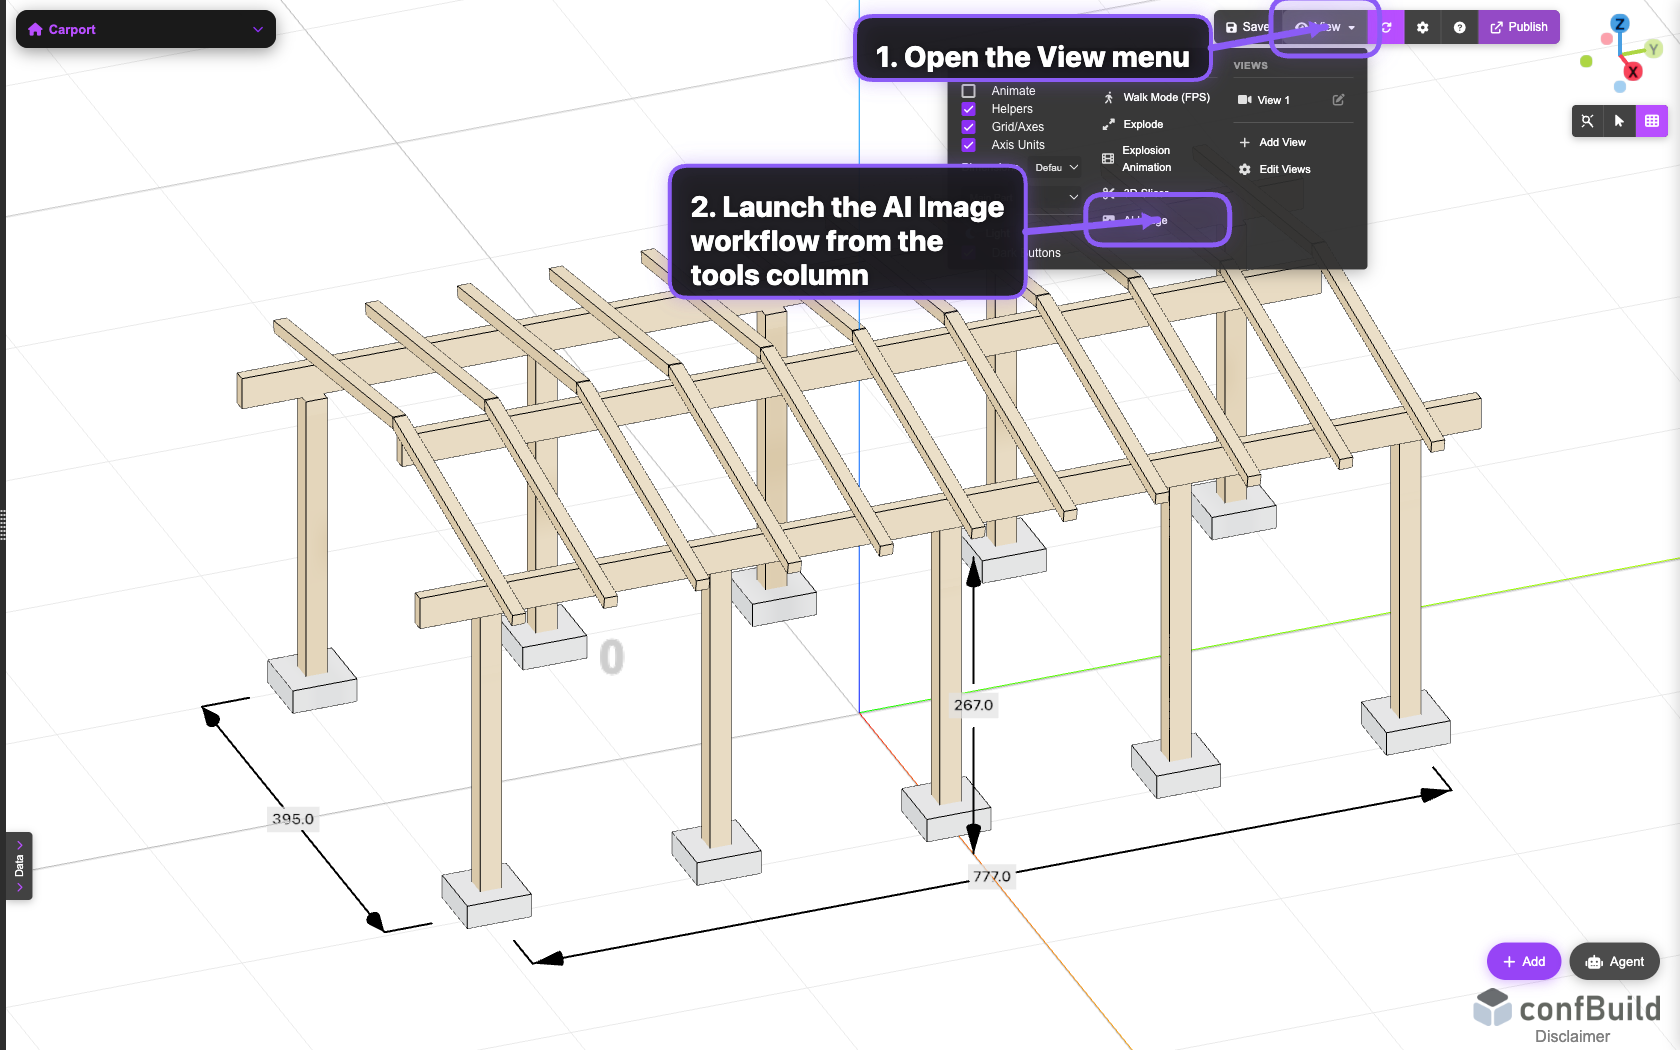
AI Image sits in the View tools column next to other scene-inspection actions, so rendering stays part of the visual review workflow.
Step 2: Prepare the prompt and optional reference image
After opening the dialog, define the visual goal in natural language. If you need a certain visual style, attach a reference image before starting the render.
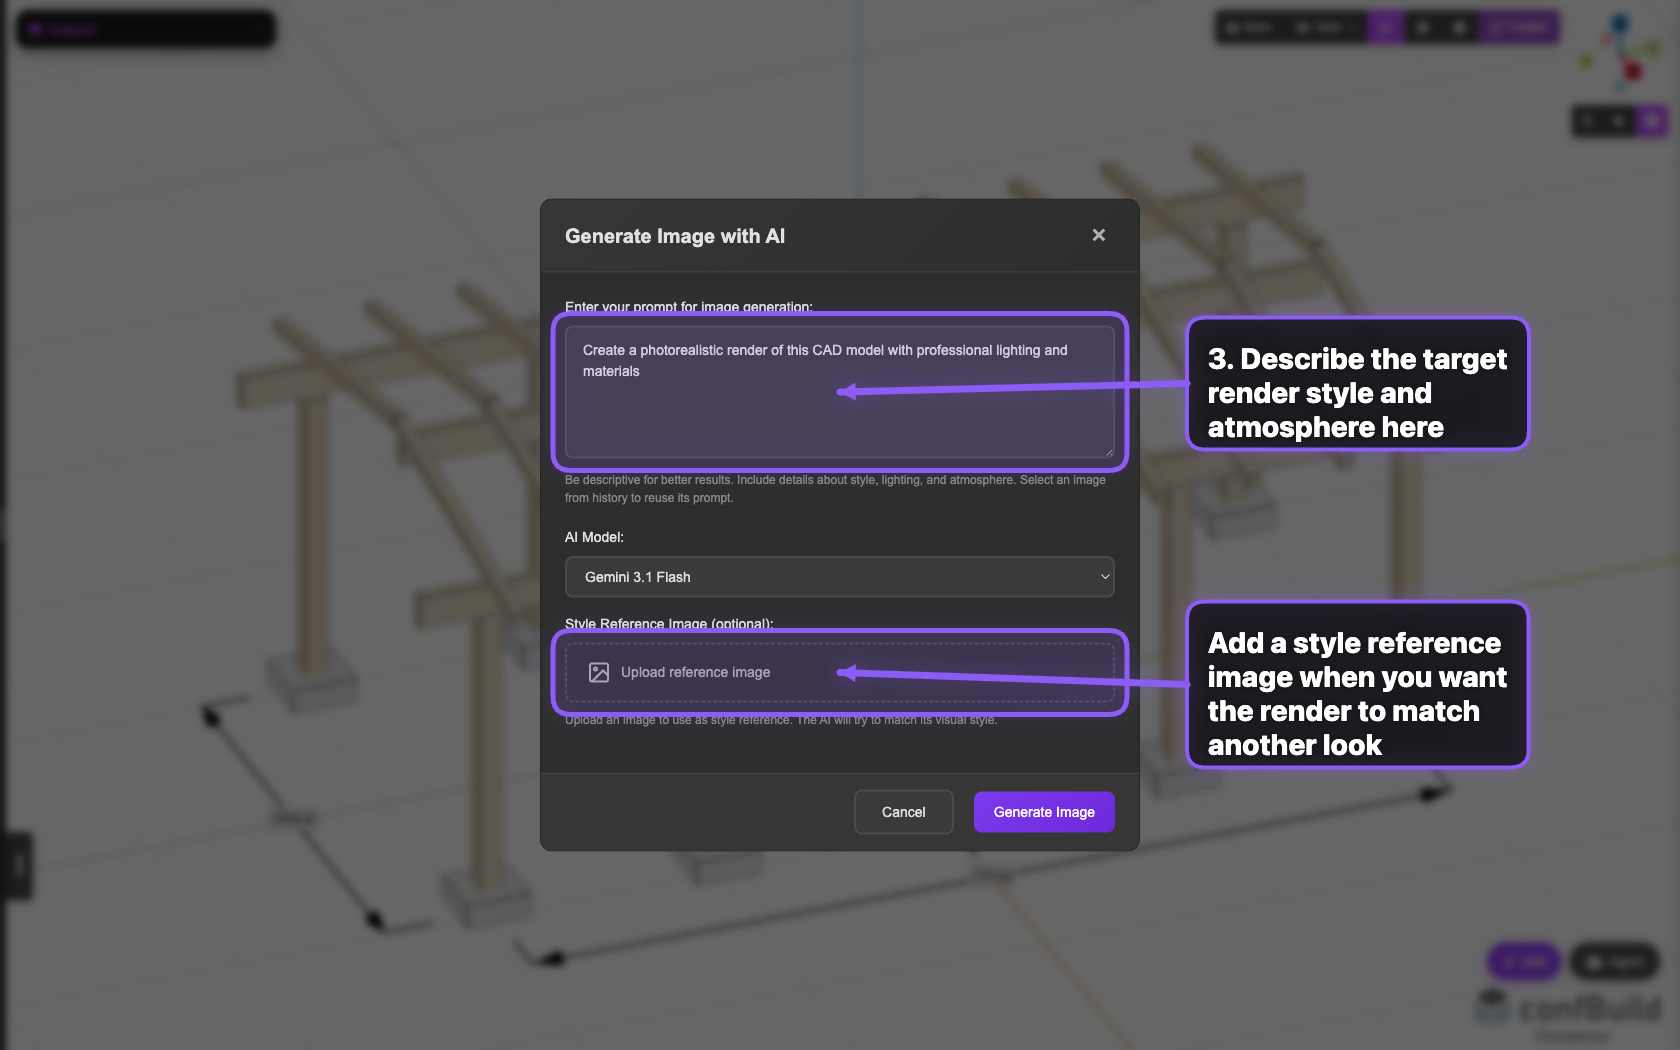
The prompt field describes the target render, while the upload area helps guide the AI toward a specific material, lighting, or brand style.
Step 3: Make the prompt specific before generating
The best results come from precise prompts. Mention lighting, materials, camera mood, and environment so the model has clear visual guidance before you click Generate Image.
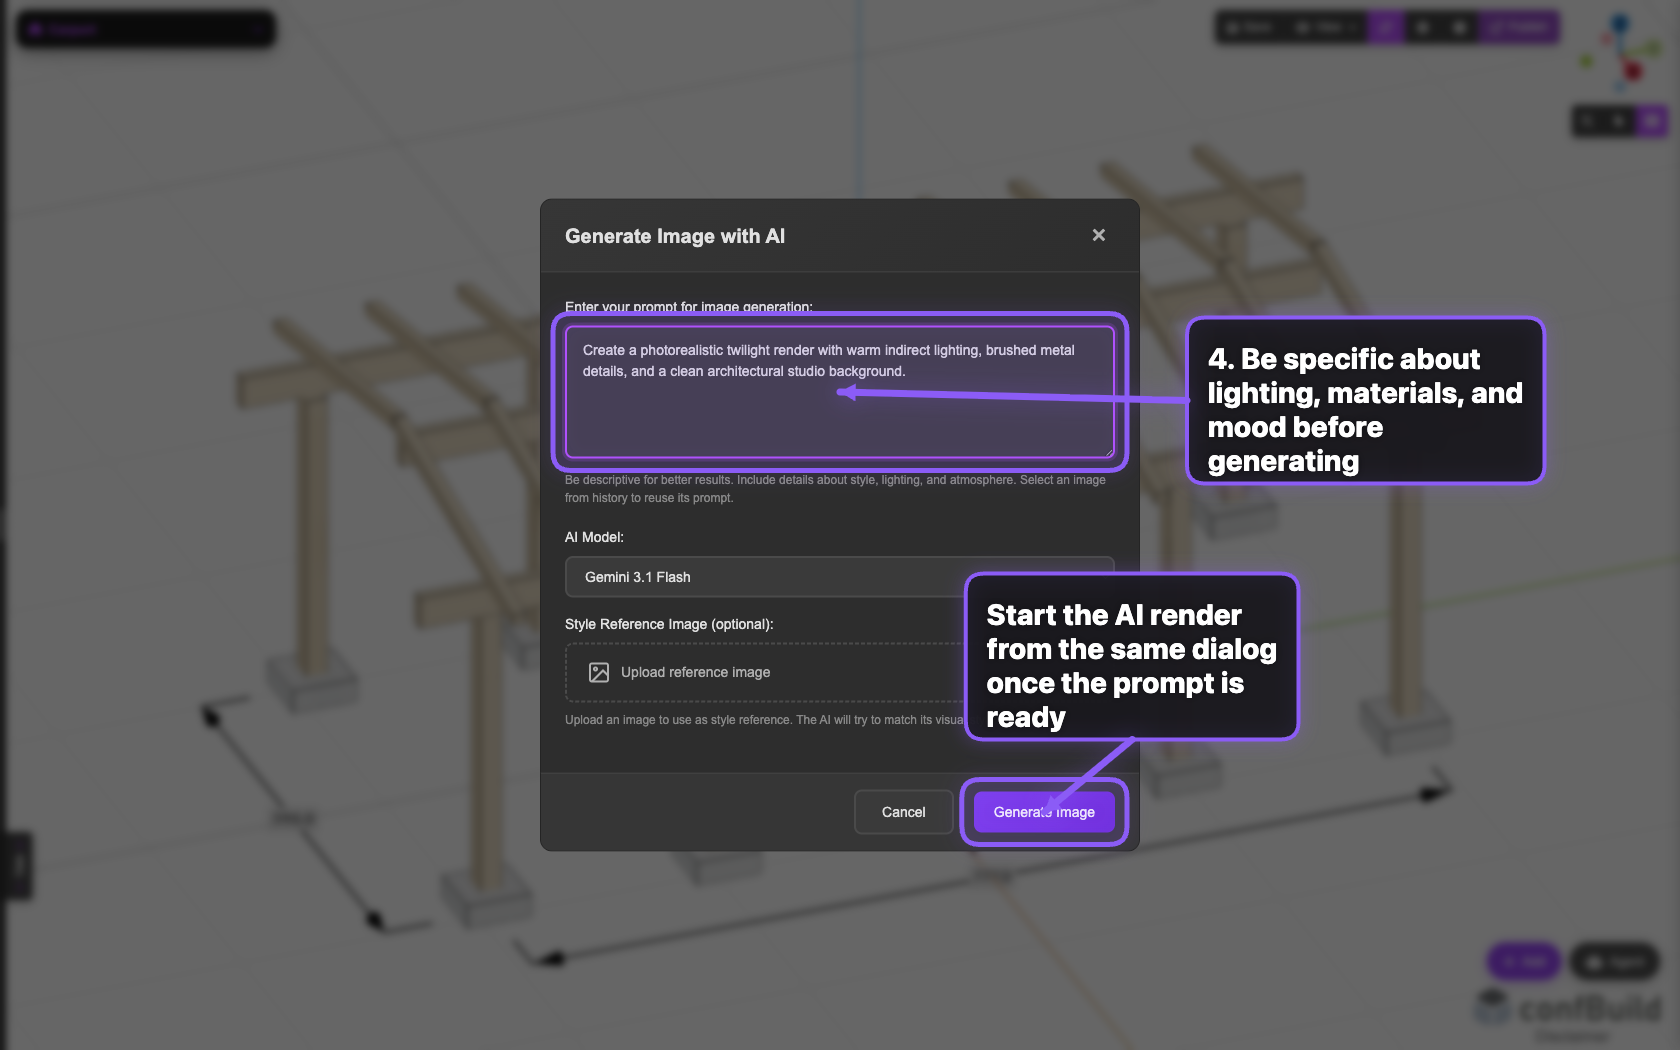
This capture shows the workflow right before generation. The next action is the actual AI render, using the prepared prompt from the same dialog.