Assembly Plan
Real browser capture of the Assembly Plan workflow
Overview
This tutorial shows the Assembly Plan panel inside the editor. The screenshots were captured on March 6, 2026 in a real browser session and document the non-destructive starting point for assembly planning and later PDF export.
Project
Editable Carport project with the full assembly visible
Workflow
Open Tools, launch Assembly Plan, define guidance and step count
Goal
Derive assembly order and documentation from the existing scene
Step 1: Open Assembly Plan from the Tools menu
The assembly-planning workflow starts directly from the Tools menu. That keeps the whole process inside the editor and lets you prepare the plan next to the live 3D view.
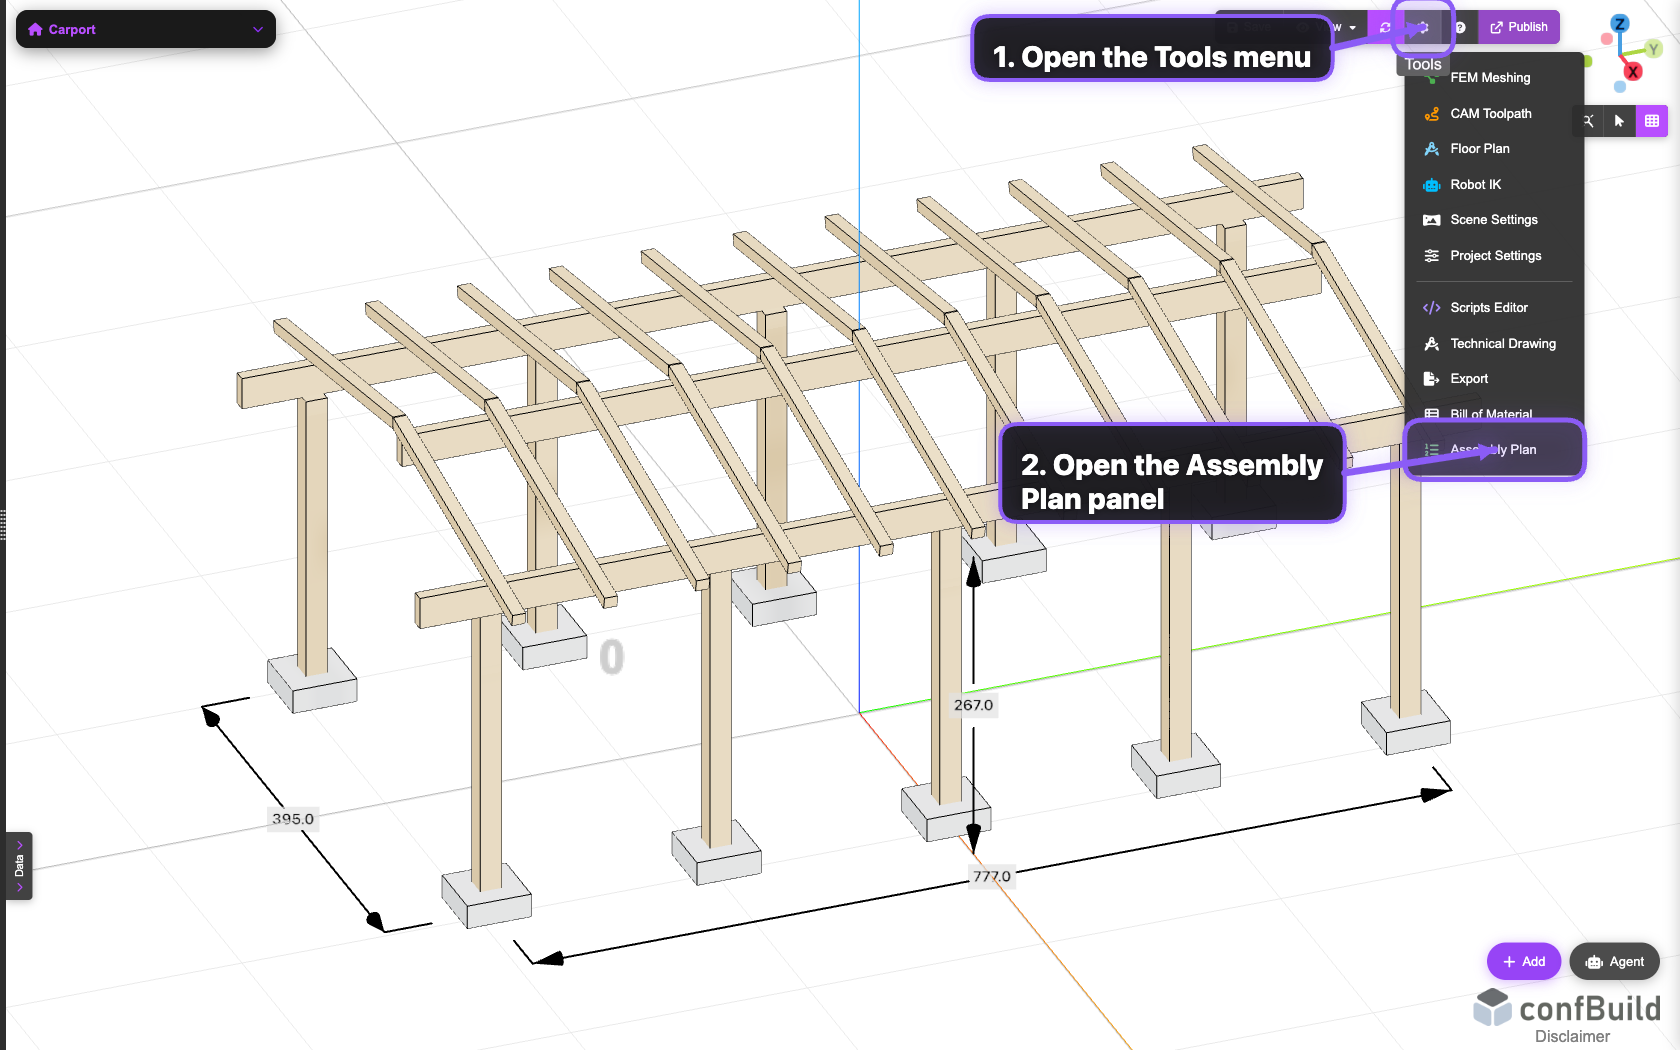
The Assembly Plan entry is part of the standard editor toolset, so you can move into planning without leaving the current project.
Step 2: Review the panel and generation controls
After opening it, the dedicated planning panel appears on the left side. You immediately get the Generate button and the guidance field for extra planning instructions.
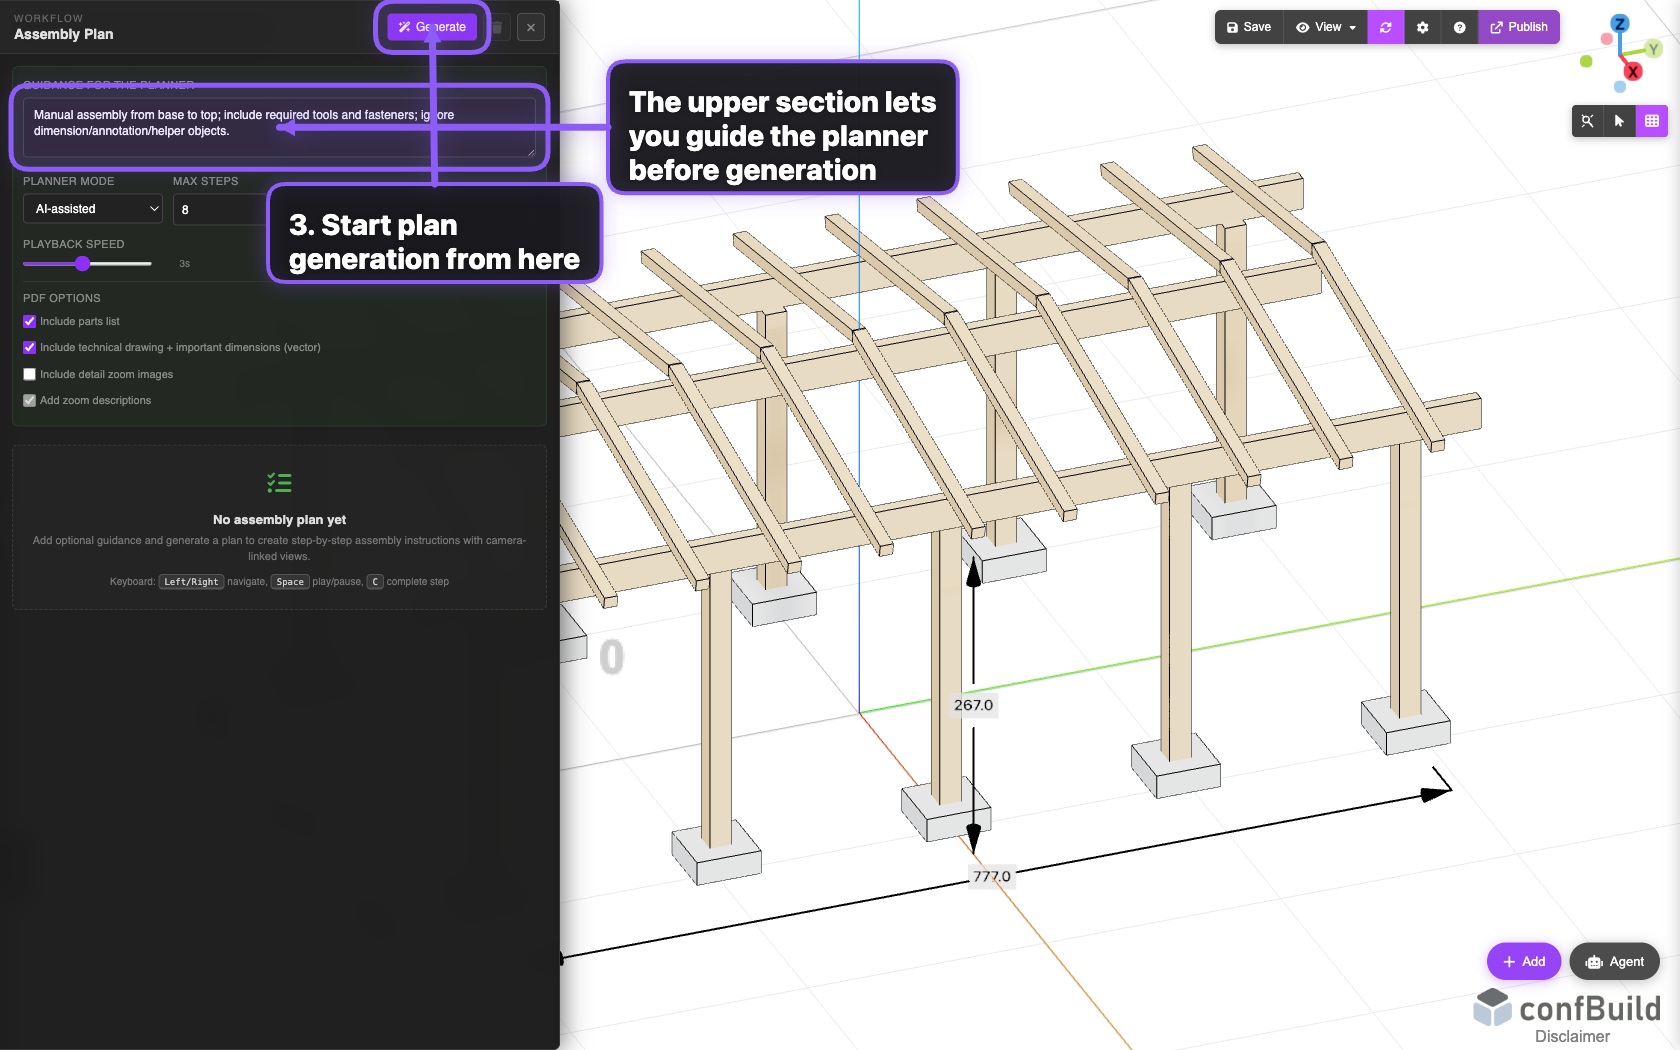
The panel stays visible next to the 3D scene, so you can tune planning parameters while keeping the model in view.
Step 3: Define guidance and a step budget
Before generating, it is useful to add a short instruction about the desired assembly logic. You can also choose the planning mode and define a practical maximum number of steps.
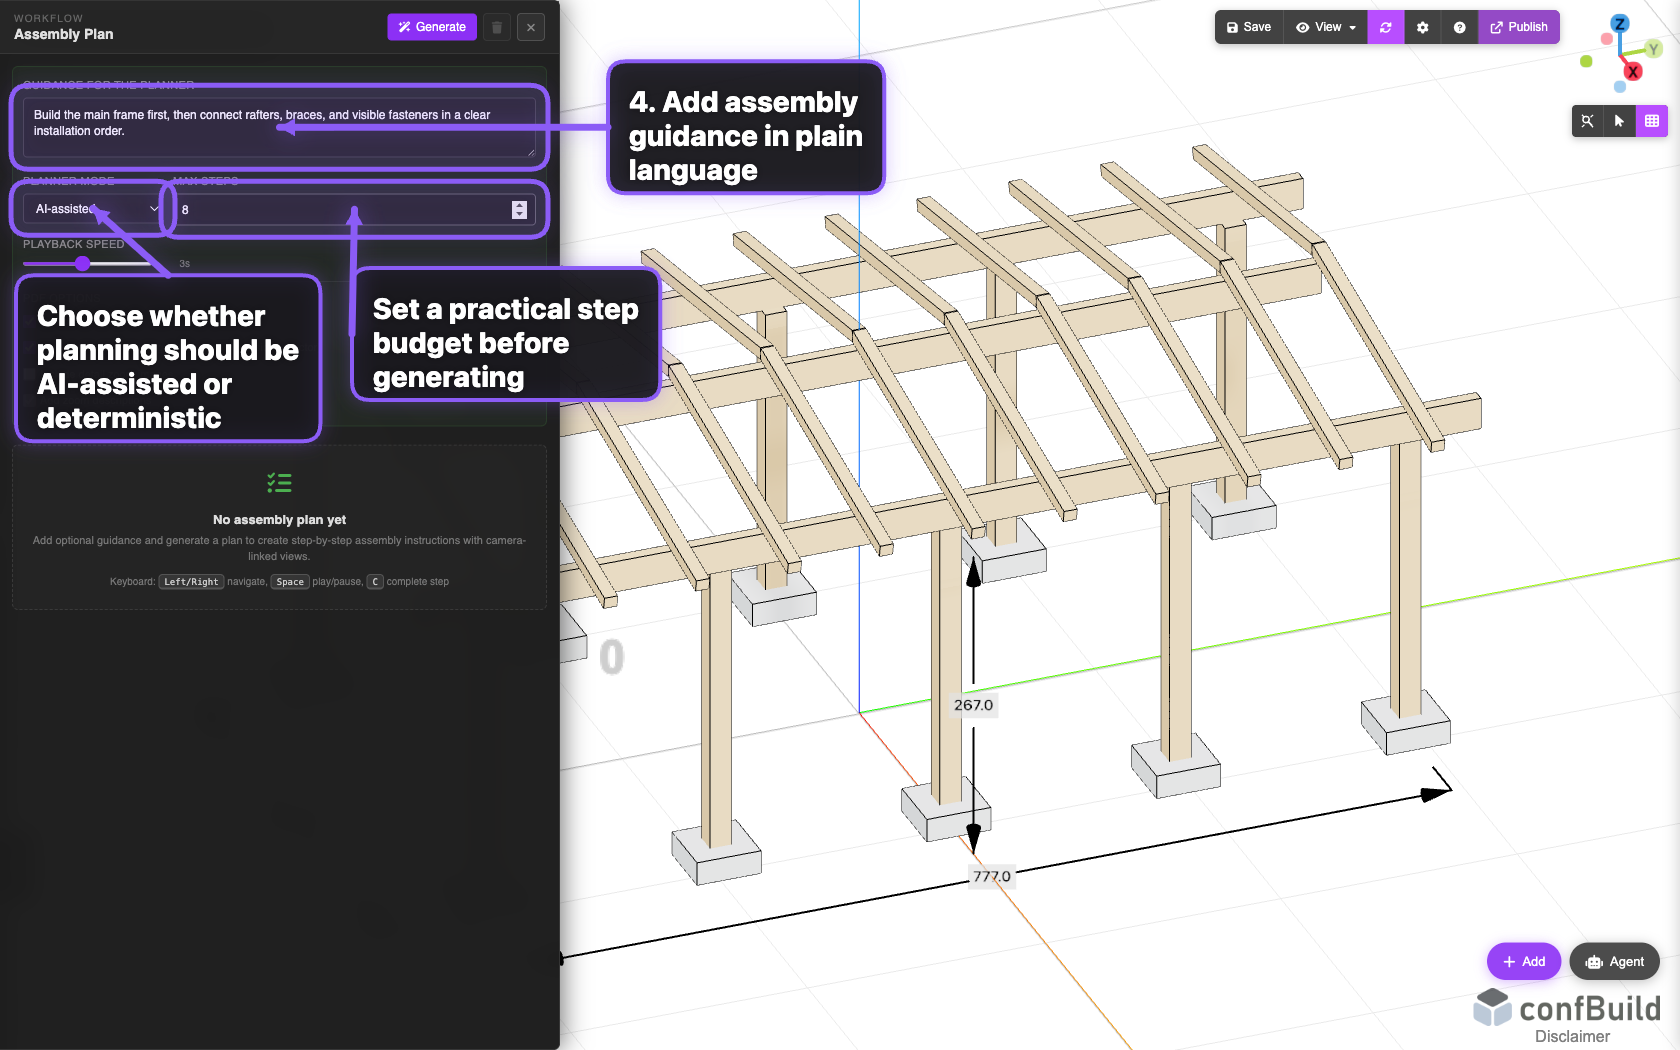
In this capture generation has not started yet. The sequence is described first, and the step budget is set so the resulting plan stays focused.