Export 3D Models
Real browser capture of the model export workflow
Overview
This tutorial shows the Export dialog inside the live confBuild editor. The screenshots were captured from the real app on March 6, 2026 and show the same workflow used for STEP, IFC, STL, glTF, and 3MF exports.
Project
Editable Carport project with the 3D scene visible
Workflow
Open Tools, launch Export, choose file type and STEP mode
Goal
Output the model for CAD, manufacturing, or downstream exchange
Step 1: Open the export dialog from Tools
The export workflow starts directly from the Tools menu in the upper-right corner of the editor. That gives you a straight path from the live model view into the format dialog.
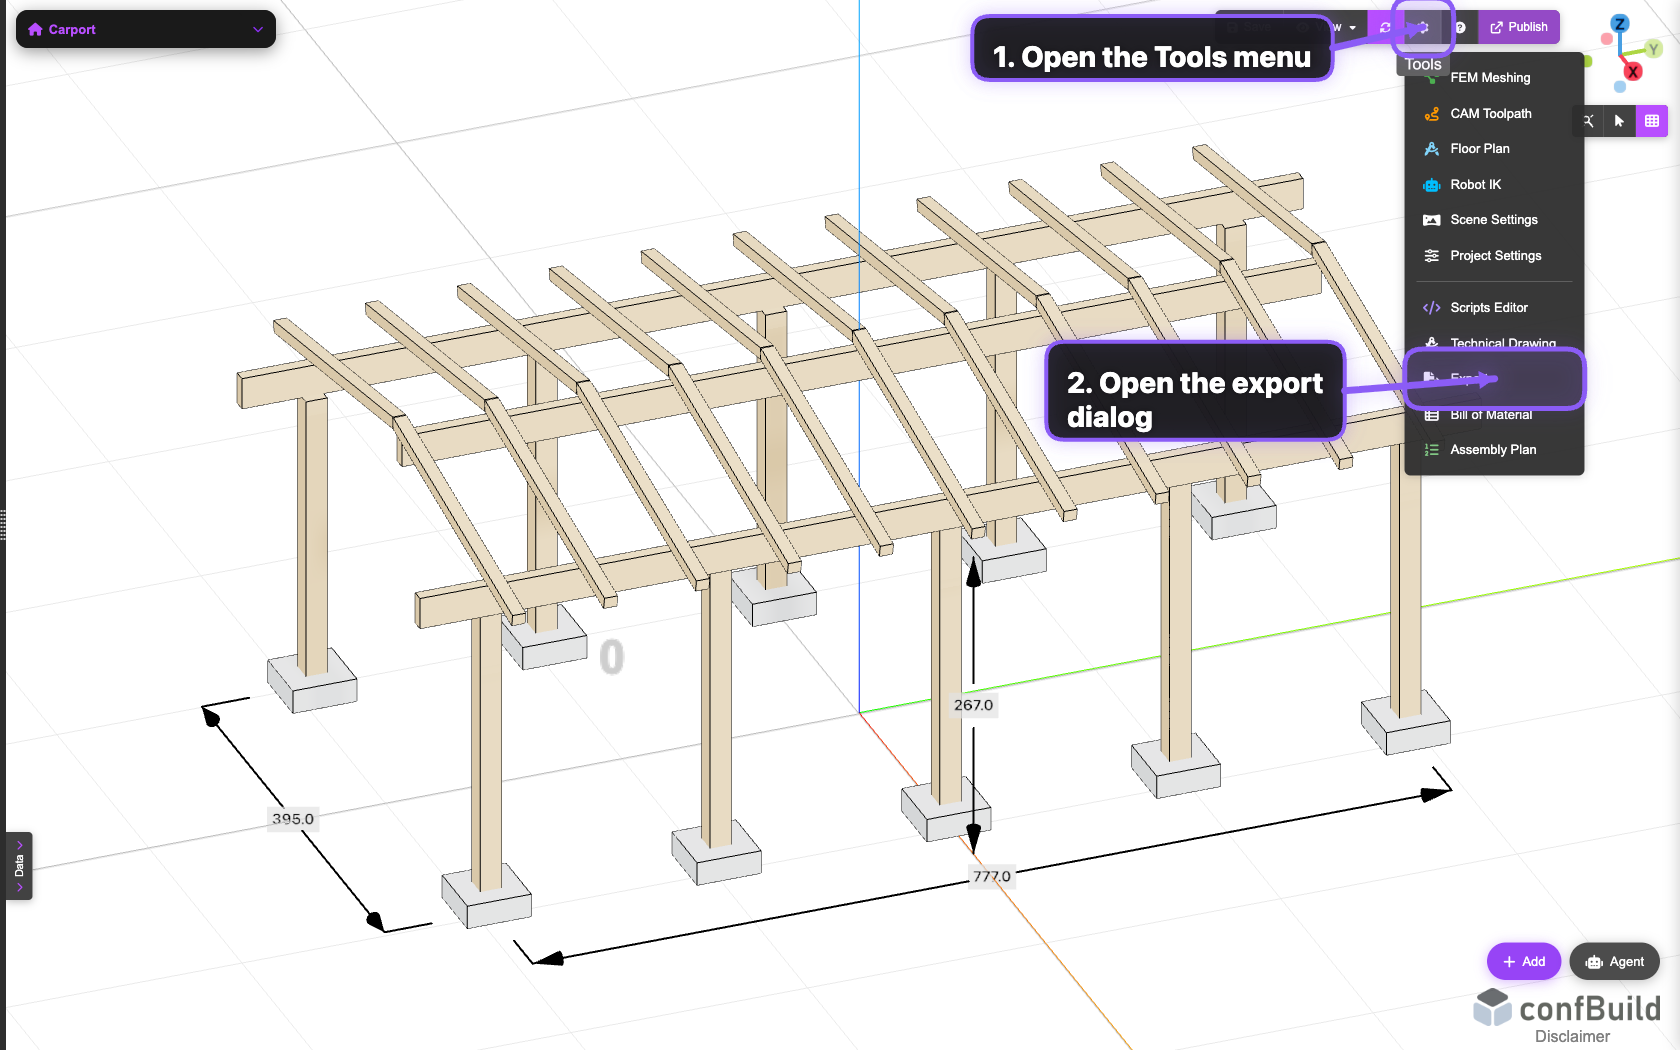
The Export entry sits next to Technical Drawing, Bill of Material, and other editor workflows, keeping output-related tasks close to the project.
Step 2: Choose the file type
Inside the export dialog, first choose the target format. As soon as STEP is selected, confBuild automatically reveals the additional STEP mode selector.
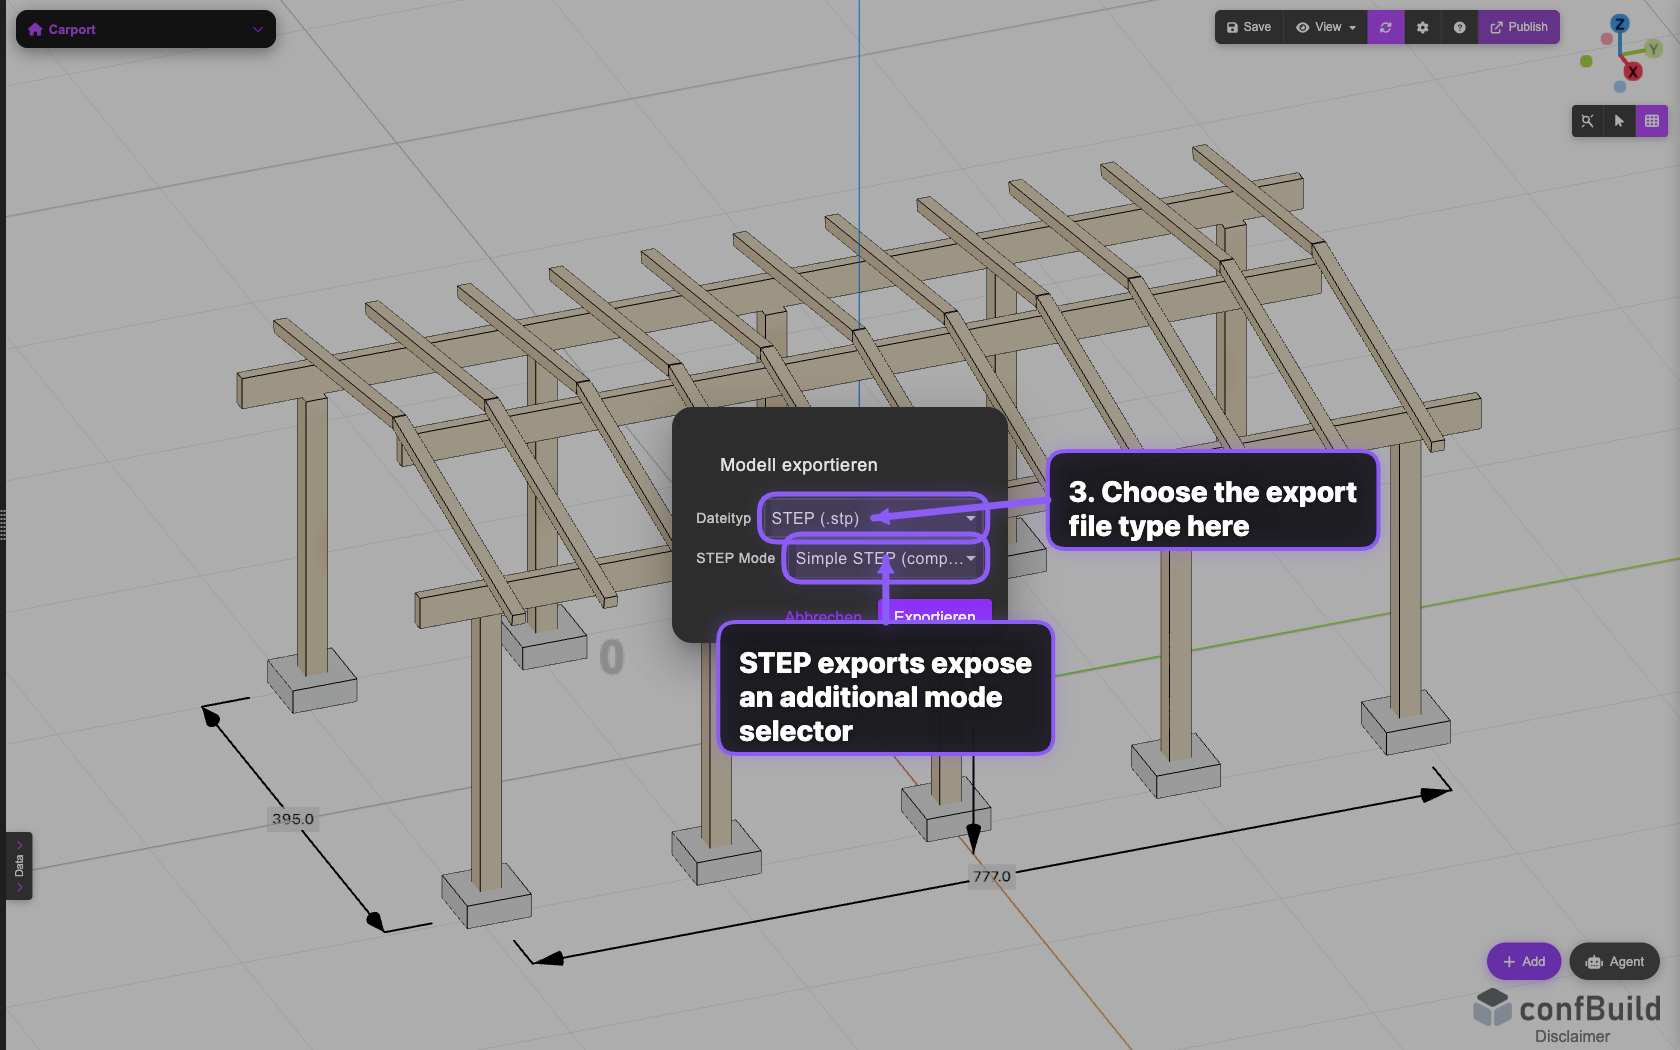
The dialog focuses on the two key decisions: target format and any export-specific options, such as STEP mode.
Step 3: Use Complex STEP for richer metadata
STEP exports offer both a simple compatibility mode and a complex mode with richer CAD metadata. For more structured handoff into downstream tools, the complex mode is usually the better choice.
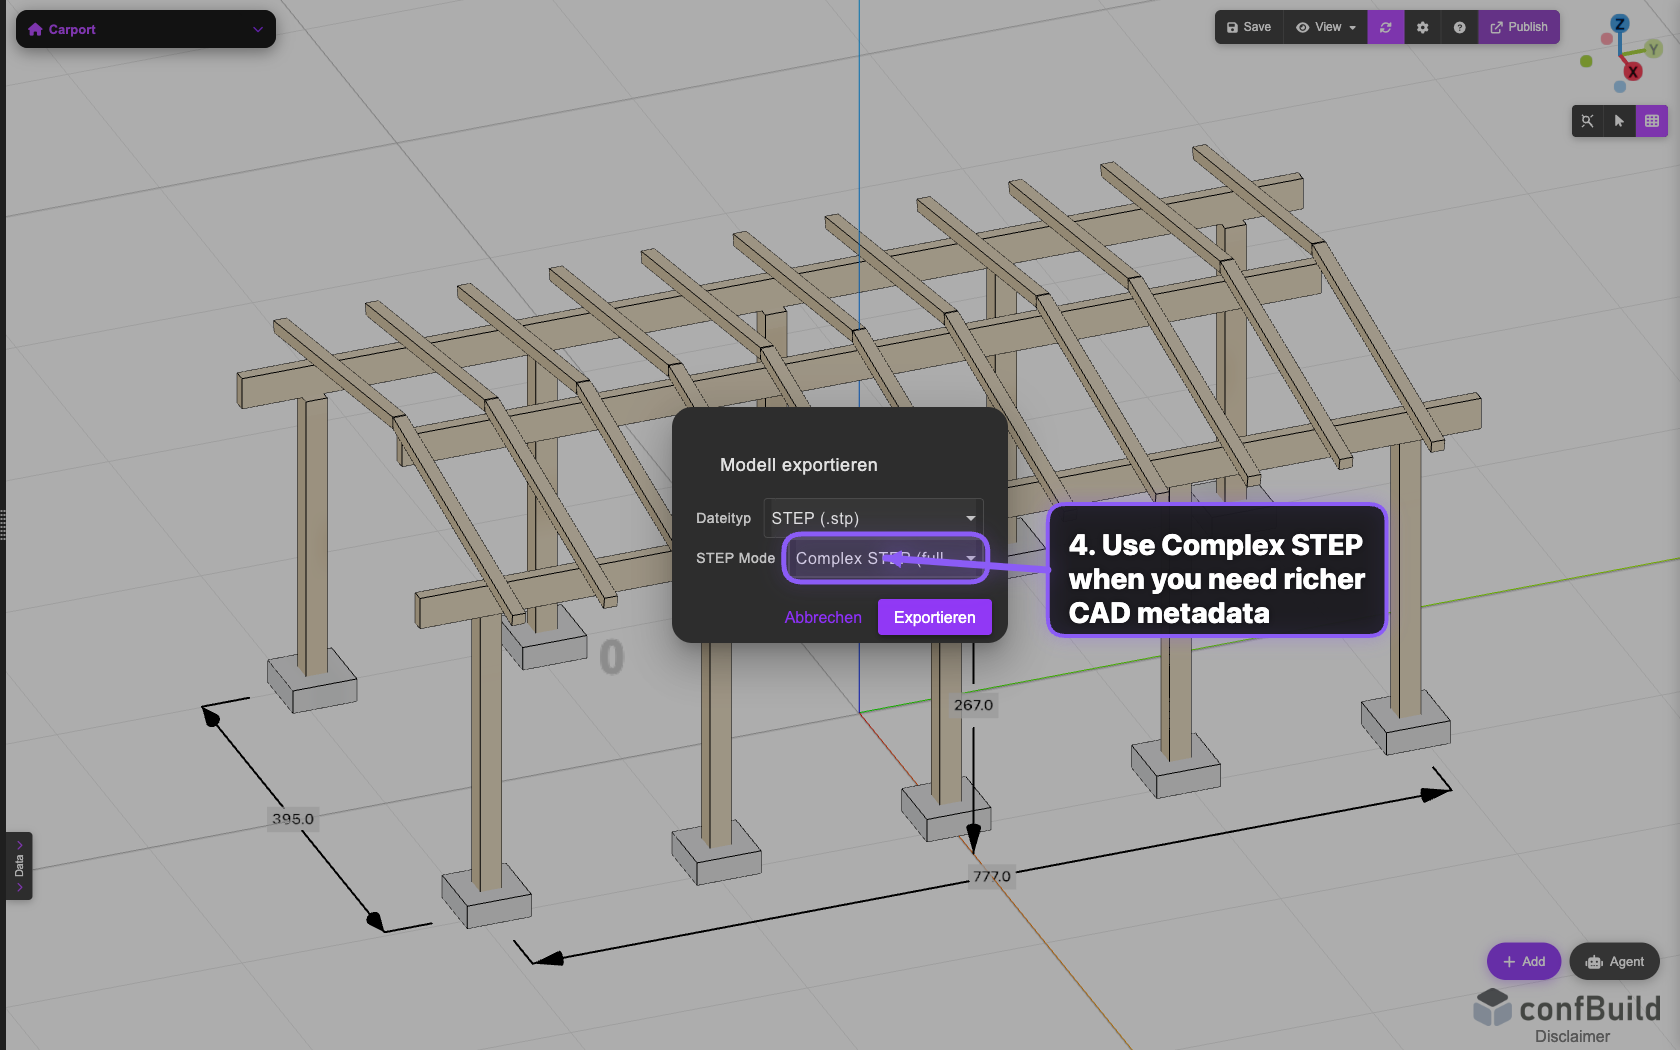
In this capture the complex STEP mode is already active. After that, start the actual export from the same dialog.