Scene Settings
Real browser capture of the Scene Settings workflow
Overview
This tutorial shows the floating Scene Settings panel in the live confBuild editor. The screenshots were captured on March 6, 2026 and show how to tune the visual presentation of a project without leaving the 3D workspace.
Project
Editable Carport project with the live scene visible
Workflow
Open Tools, launch Scene Settings, tune background and light
Goal
Improve scene readability and visual quality directly in the editor
Step 1: Open Scene Settings from the Tools menu
The scene look and lighting controls are available from the main Tools menu. That keeps environment tuning close to the other editor workflows.
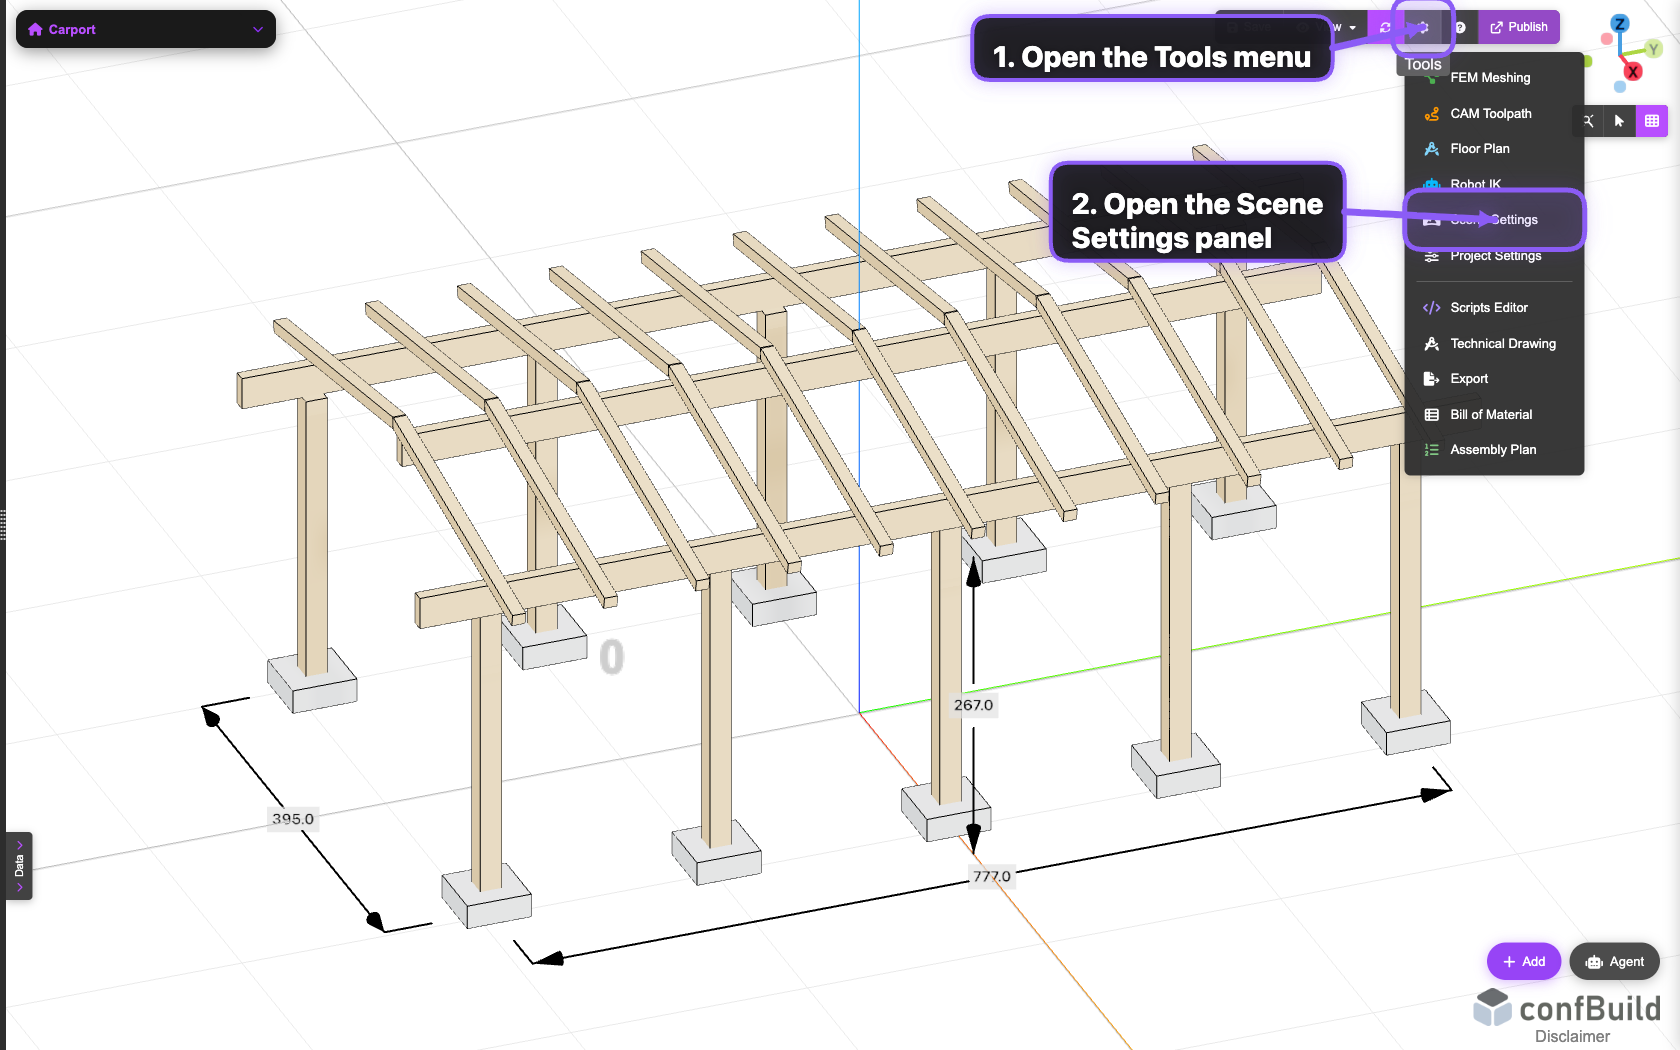
Scene Settings appears inside the same menu as export, floor plan, and technical drawing, so visual tuning stays part of the standard project workflow.
Step 2: Adjust background, fog, and display behavior
After opening the panel, start with the left column. This area controls the light and dark background gradients, fog depth, and a few display options that affect how the scene is perceived.
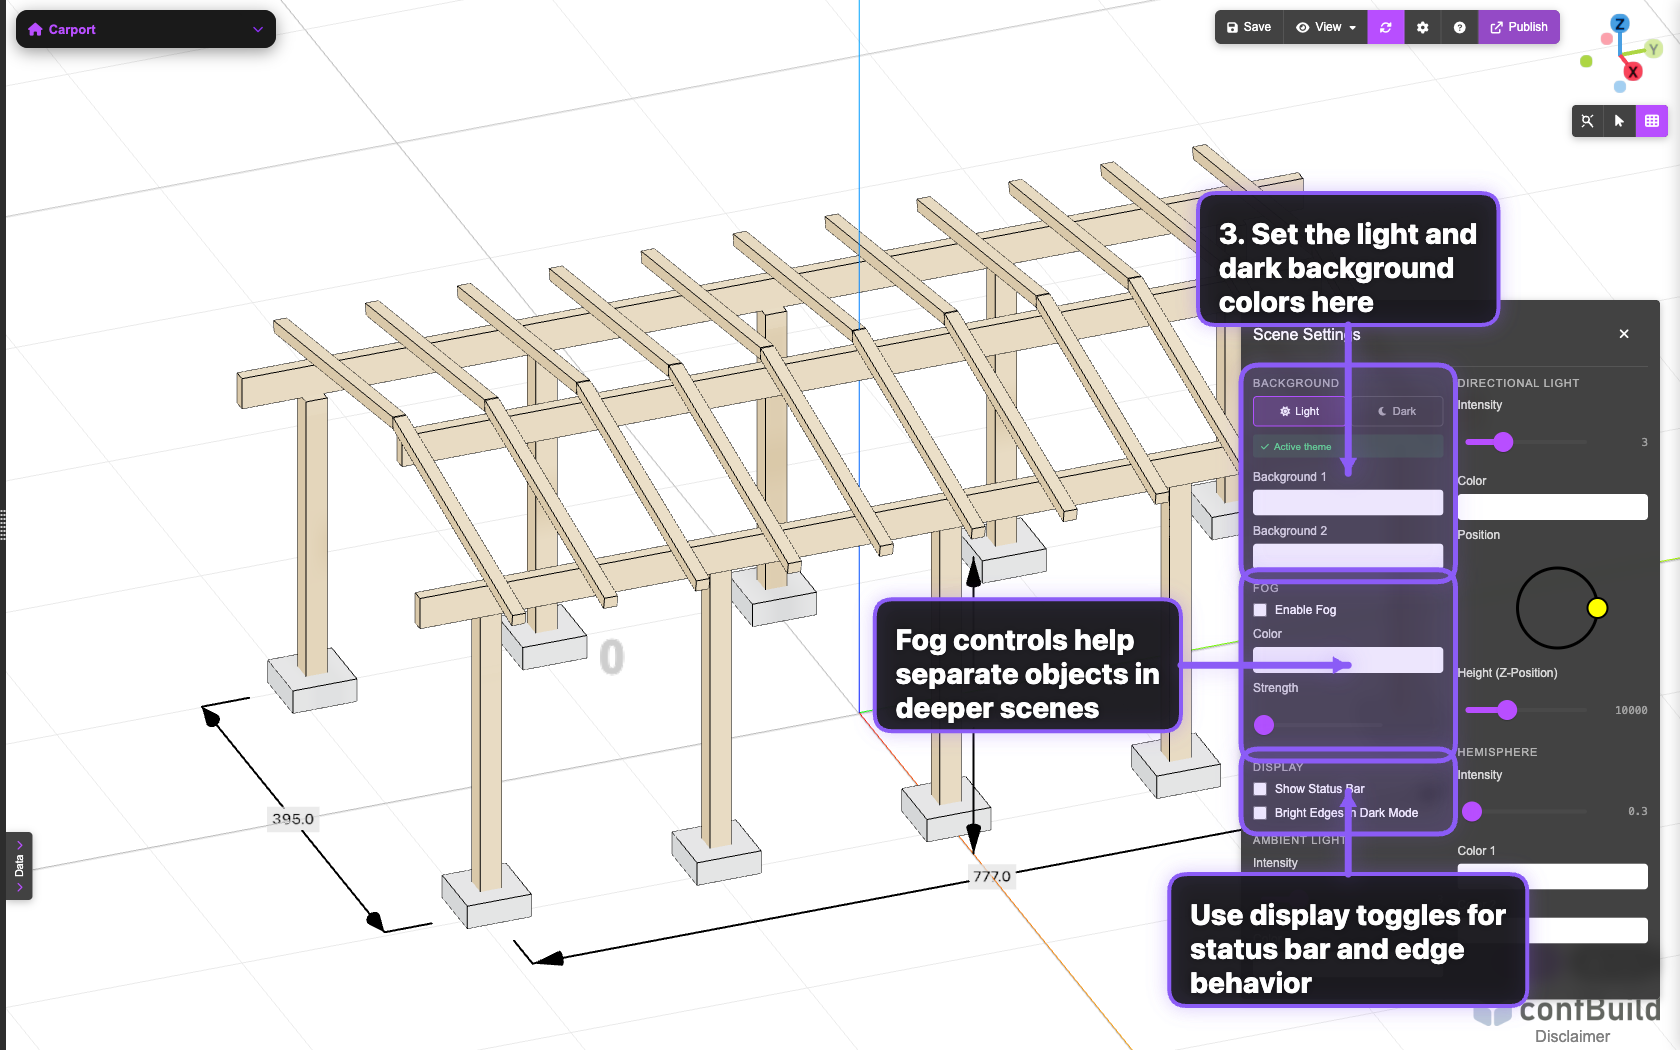
The background and fog sections shape the overall atmosphere first, while the display toggles help keep the viewport clear for the current project.
Step 3: Fine-tune the main light setup
The right column focuses on lighting. Use the directional light to define the primary shading direction, then balance the scene with hemisphere light colors and intensity.
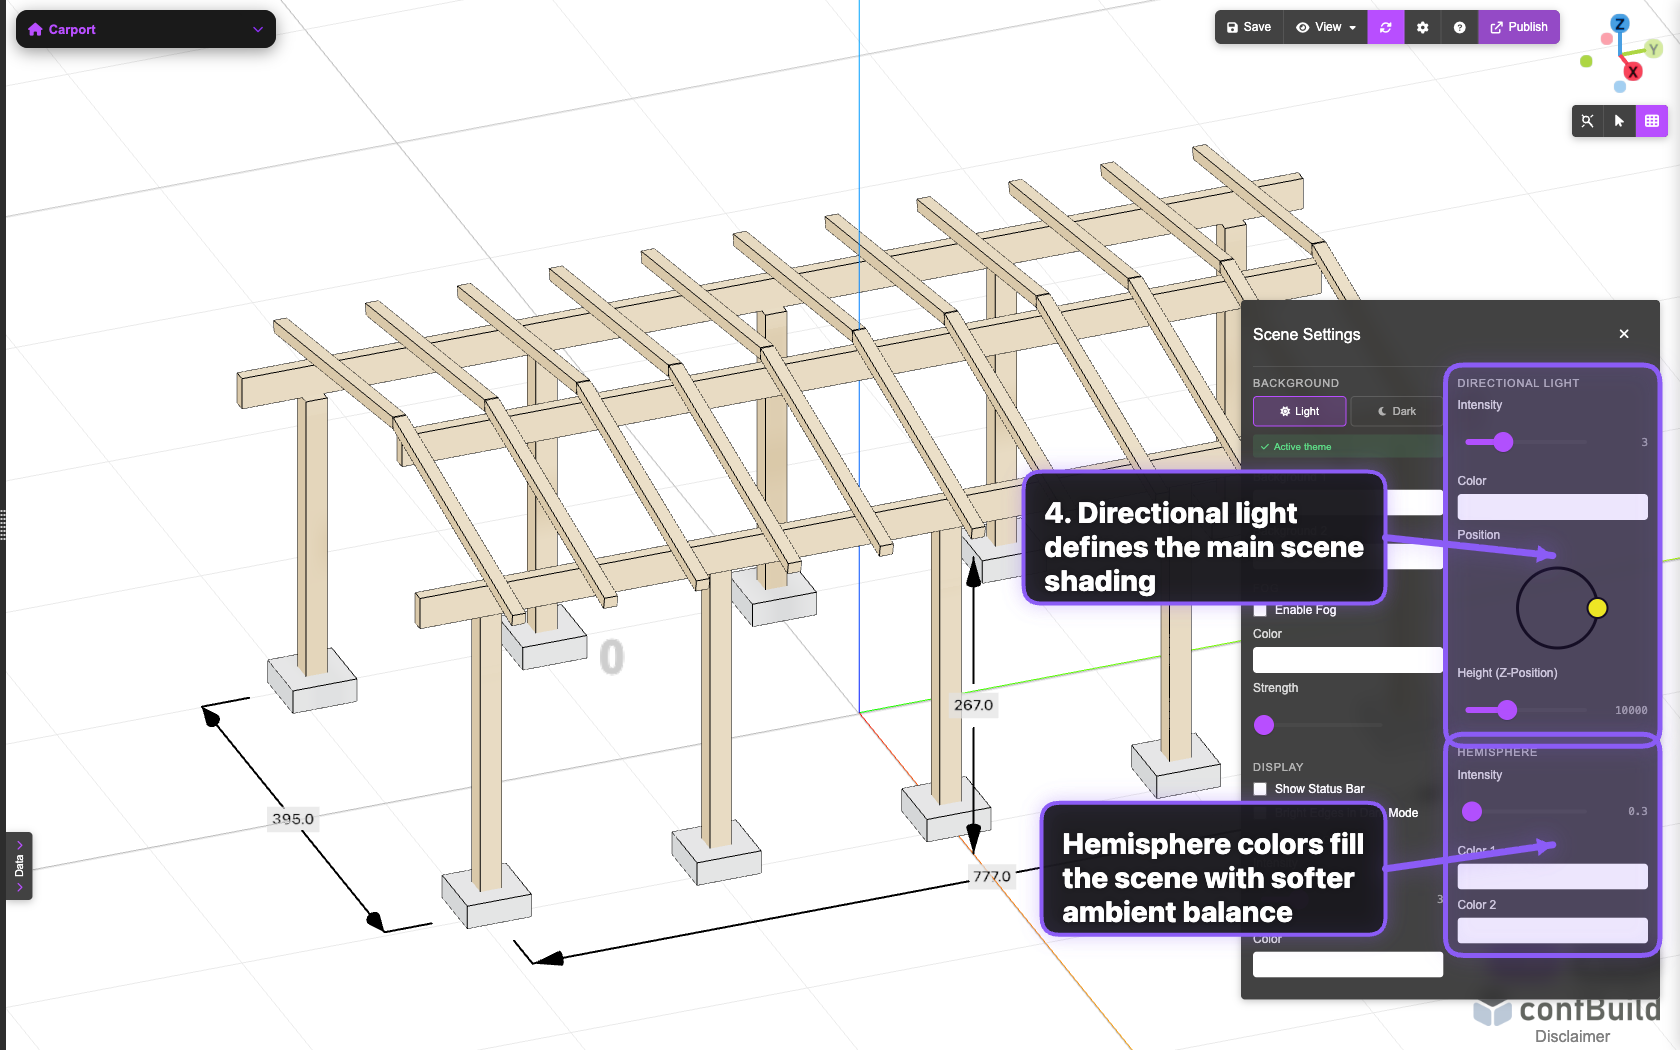
These controls change how edges, surfaces, and materials read in the viewport, which is especially useful before screenshots, AI renders, or documentation exports.