Floor Plan Editor
Real browser capture of the floor-plan workflow
Overview
This tutorial shows the Floor Plan Editor inside the confBuild editor. The screenshots were captured from the real app on March 6, 2026 and document the entry into the floor-plan workflow without saving any project changes.
Project
Editable Carport project opened in the normal editor
Workflow
Open Tools, launch Floor Plan, review floors and tools
Goal
Prepare floor plans, structure rooms, and use wall-editing tools
Step 1: Open Floor Plan Editor from the Tools menu
The entry point is the Tools menu in the main editor. That lets you move from the 3D scene into the floor-plan dialog without losing project context.
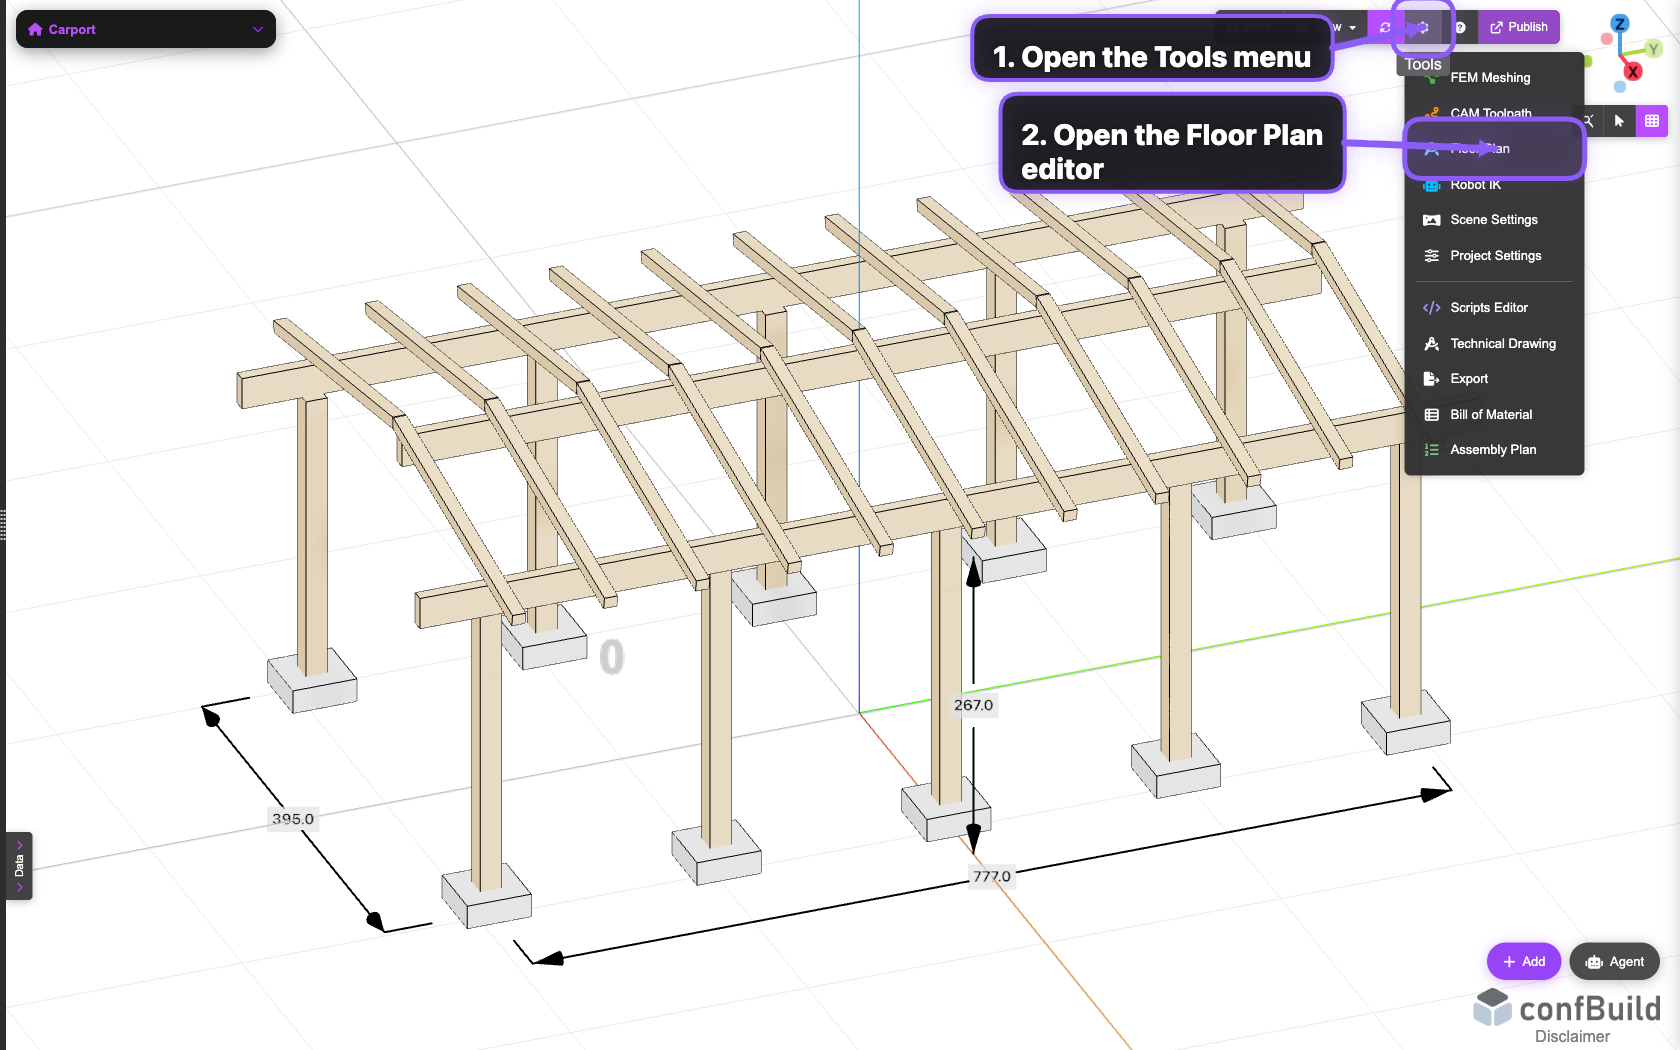
The Floor Plan entry lives in the same menu as the other editor tools, so the workflow stays tightly connected to the current project.
Step 2: Review the project name and floor list
Inside the dialog, the left side shows the project data and the list of available floors. From there you can add new levels or switch between existing ones.
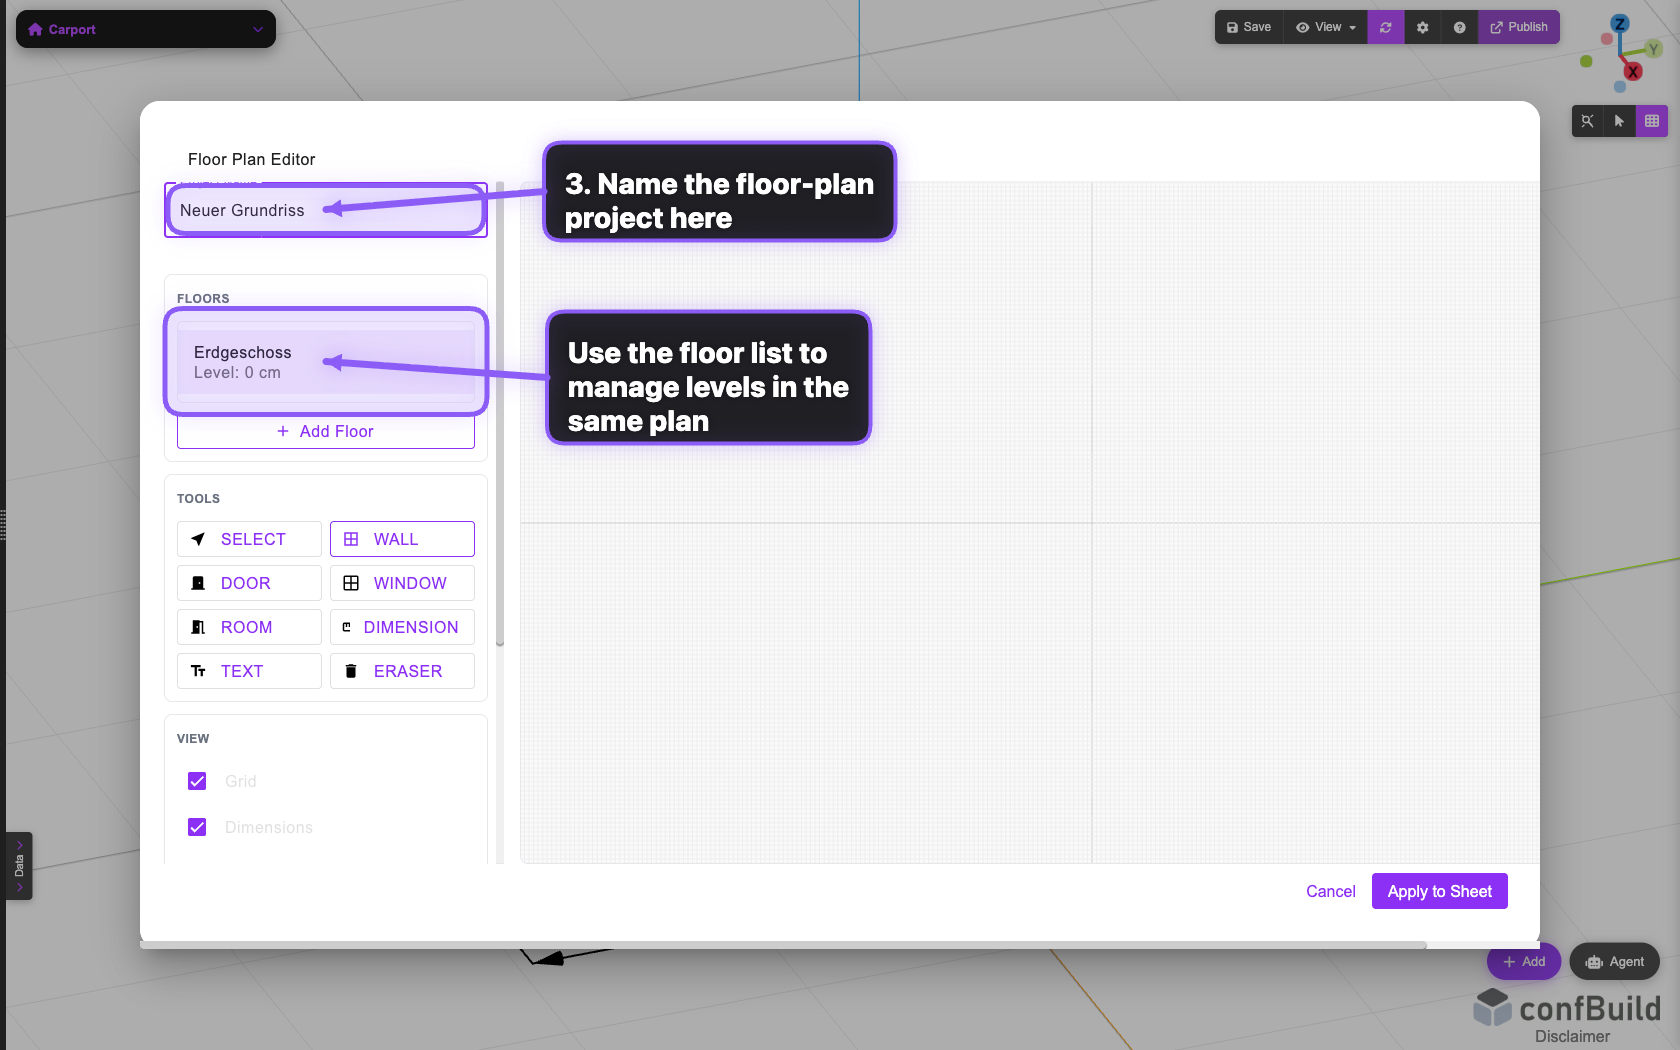
The left section brings together project naming, floor management, and supporting controls, while the drawing canvas stays visible on the right.
Step 3: Use the tools and view controls
Below the floor list, you get the tool palette for walls, rooms, and editing as well as the view toggles for grid, dimensions, and room labels.
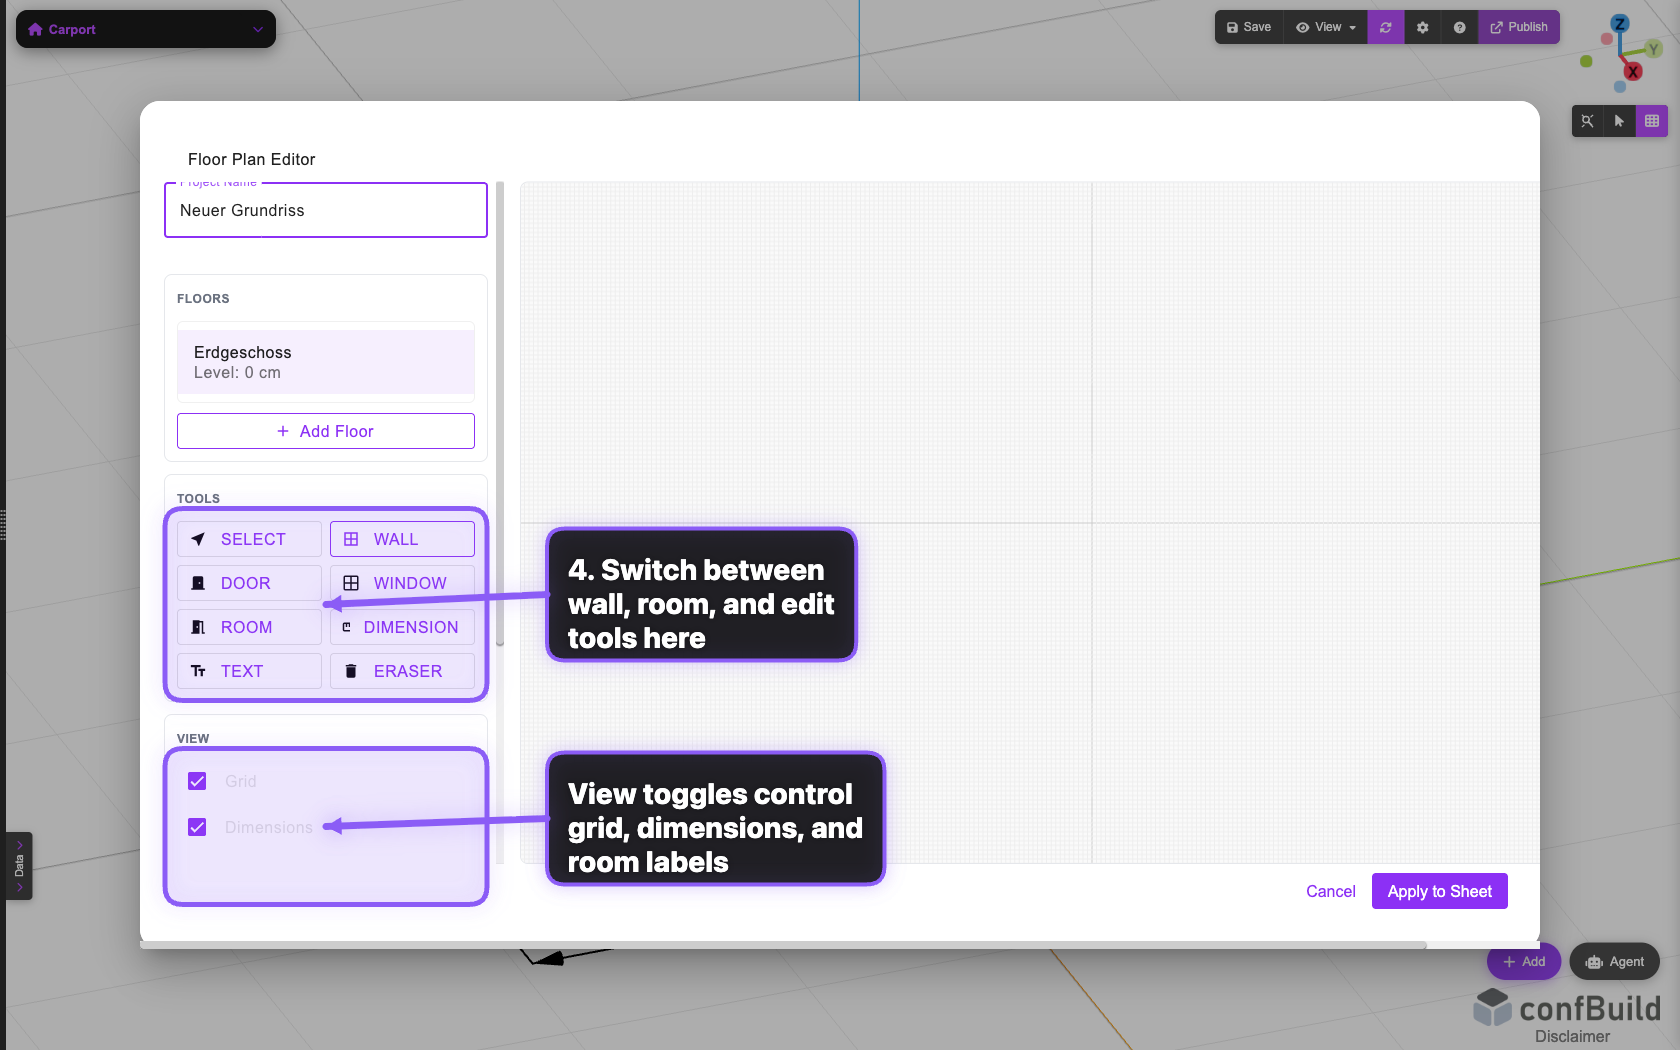
That gives you the key floor-plan tools immediately. Only after the plan is correct do you apply it to the active sheet with Apply to Sheet.